
Production-ready MLFlow setup in your local machine

MLFlow is an open-source platform built to manage the entire machine learning lifecycle—covering everything from experimentation and reproducibility to deployment. It works seamlessly with various ML libraries and frameworks, like TensorFlow and Scikit-learn, and integrates easily into existing workflows. That’s why many data science and machine learning teams rely on MLFlow for experiment tracking and model management.
Getting started with MLFlow is straightforward. Just install it using pip and launch the tracking server with these simple commands:
pip install mlflow
mlflow server
This will set up an MLFlow tracking server that uses your local file system as the artifact store and an SQLite database as the metadata store. While this might be sufficient for local development, it's often better to align your development environment as closely as possible with production to avoid issues when deploying.
In this post, I'll guide you through setting up a production-ready MLFlow environment on your local machine. The setup will use a remote tracking server configuration, with PostgreSQL as the backend database and MinIO as the artifact store. We'll also containerize the entire setup using Docker, making it easy to share with your team and even deploy directly to production.
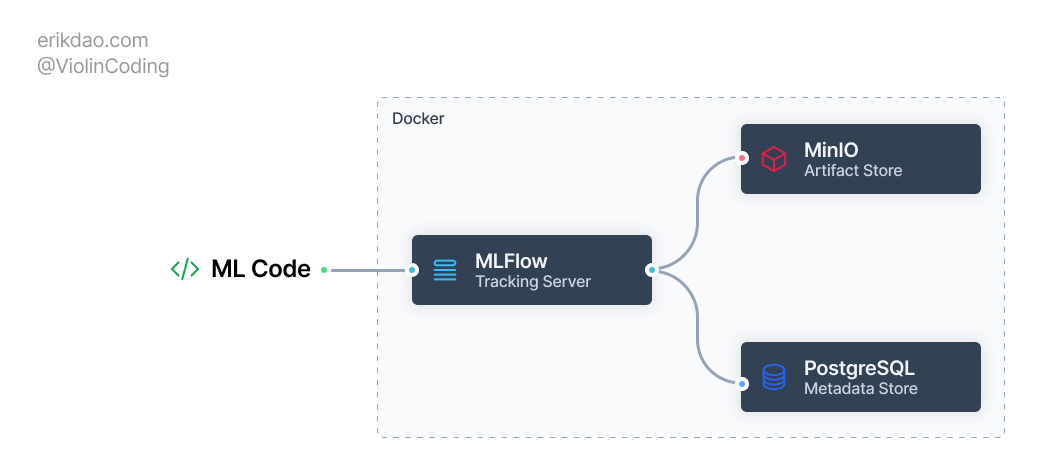
Setup PostgreSQL
PostgreSQL is the most popular open-source relational database. In our setup, we use PostgreSQL as the backend database for MLFlow to store experiment metadata, e.g., parameters, metrics, runs, etc.
Let's create a docker-compose.yml file inside the docker directory and populate it with the PostgreSQL service definition.
services:
  postgres:
    image: postgres:latest
    container_name: postgres
    restart: always
    ports:
      - "5432:5432"
    environment:
      - POSTGRES_USER=${POSTGRES_USER}
      - POSTGRES_PASSWORD=${POSTGRES_PASSWORD}
      - POSTGRES_DB=${POSTGRES_DB}
    volumes:
      - postgres_data:/var/lib/postgresql/data
      - ./postgres/init.sql:/docker-entrypoint-initdb.d/init.sql
We're using the latest version of PostgreSQL, expose the default port 5432 to our lolcal machine. We also mount a volume to the init.sql file, which will be used to initialize mlflow database required for MLFLow.
Let's add the init.sql file to the docker/postgres directory.
CREATE DATABASE mlflow;A good practice is to use environment variables to store sensitive information like database credentials. We can use a .env file, which is untracked by git, to store these variables and use docker-compose to load them into the environment.
# docker/.env
POSTGRES_USER=postgres
POSTGRES_PASSWORD=postgres
POSTGRES_DB=postgres
Setup MinIO
MinIO is an open-source object storage server that is compatible with Amazon S3 cloud storage service. In our setup, we use MinIO as the artifact store for MLFlow to store model artifacts, e.g., models, datasets, etc.
minio:
  restart: always
  image: quay.io/minio/minio
  container_name: minio
  ports:
    - "9000:9000"
    - "9001:9001"
  environment:
    - MINIO_ROOT_USER=${MINIO_ACCESS_KEY}
    - MINIO_ROOT_PASSWORD=${MINIO_SECRET_ACCESS_KEY}
    - MINIO_STORAGE_USE_HTTPS=false
  command: server /data --console-address ":9001"
  volumes:
    - minio_data:/data

minio-setup:
  image: quay.io/minio/mc
  depends_on:
    - minio
  volumes:
    - ./minio/create-bucket.sh:/create-bucket.sh
  entrypoint: /bin/sh
  command: -c "chmod +x /create-bucket.sh && /create-bucket.sh"
  environment:
    - MINIO_ROOT_USER=${MINIO_ACCESS_KEY}
    - MINIO_ROOT_PASSWORD=${MINIO_SECRET_ACCESS_KEY}
Let's break down what we've done in the code above.
First, we define a
minioservice that exposes two ports,9000for MinIO server and9001for the MinIO Console UI, set proper root user and password with values from the.envfile.Second, we define a
minio-setupservice that basically runs the MinIO Clientmccommand to create a bucket for MLFlow.
The content of the create-bucket.sh file is as follows:
# docker/minio/create-bucket.sh
#!/bin/sh
# Configure MinIO Client
mc alias set minioserver http://minio:9000 ${MINIO_ROOT_USER} ${MINIO_ROOT_PASSWORD}

# Create the MLFlow bucket
mc mb minioserver/mlflow
Setup MlFlow
After setting up PostgreSQL and MinIO, we're ready to setup MLFlow. At the time of this writing, the official MLFlow Docker image does not support the setup we have with PostgreSQL and MinIO out of the box. We'll have to build our own Docker image for MLFlow.
Create a Dockerfile inside the docker/mlflow directory and populate it with the following content:
FROM python:3.11-slim-buster

# Install python package
COPY requirements.txt /tmp/
RUN pip install --no-cache-dir -r /tmp/requirements.txt
The requirements.txt file contains several packages we need for the setup
psycopg2-binary==2.9.9
mlflow==2.10.2
boto3==1.34.43
Then we can define the MLFlow service in the docker-compose.yml file, with our custom Docker image as follows:
mlflow:
  restart: always
  build: ./mlflow
  image: mlflow_server
  container_name: mlflow_server
  ports:
    - "5001:5000"
  environment:
    - AWS_ACCESS_KEY_ID=${MINIO_ACCESS_KEY}
    - AWS_SECRET_ACCESS_KEY=${MINIO_SECRET_ACCESS_KEY}
    - MLFLOW_S3_ENDPOINT_URL=http://localhost:9000
    - MLFLOW_S3_IGNORE_TLS=true
  command: >
    mlflow server
    --backend-store-uri postgresql://postgres:postgres@postgres/mlflow
    --host 0.0.0.0
    --serve-artifacts
    --artifacts-destination s3://mlflow
  depends_on:
    - postgres
    - minio-setup
We define an MLFlow service that runs the MLFlow tracking server that uses PostgreSQL as the backend store and MinIO as the artifact store. An avid reader (like you) might notice that we're exposing port 5001 instead of the default 5000 in our host machine. This is a workaround if you're running the setup on MacOS as a system service of the OS also uses this port. If you're using Linux, you can use the default port 5000.
The final step is to build and run the services with docker-compose:
docker-compose up -d --buildIf everything is setup properly, you should be able to access the services
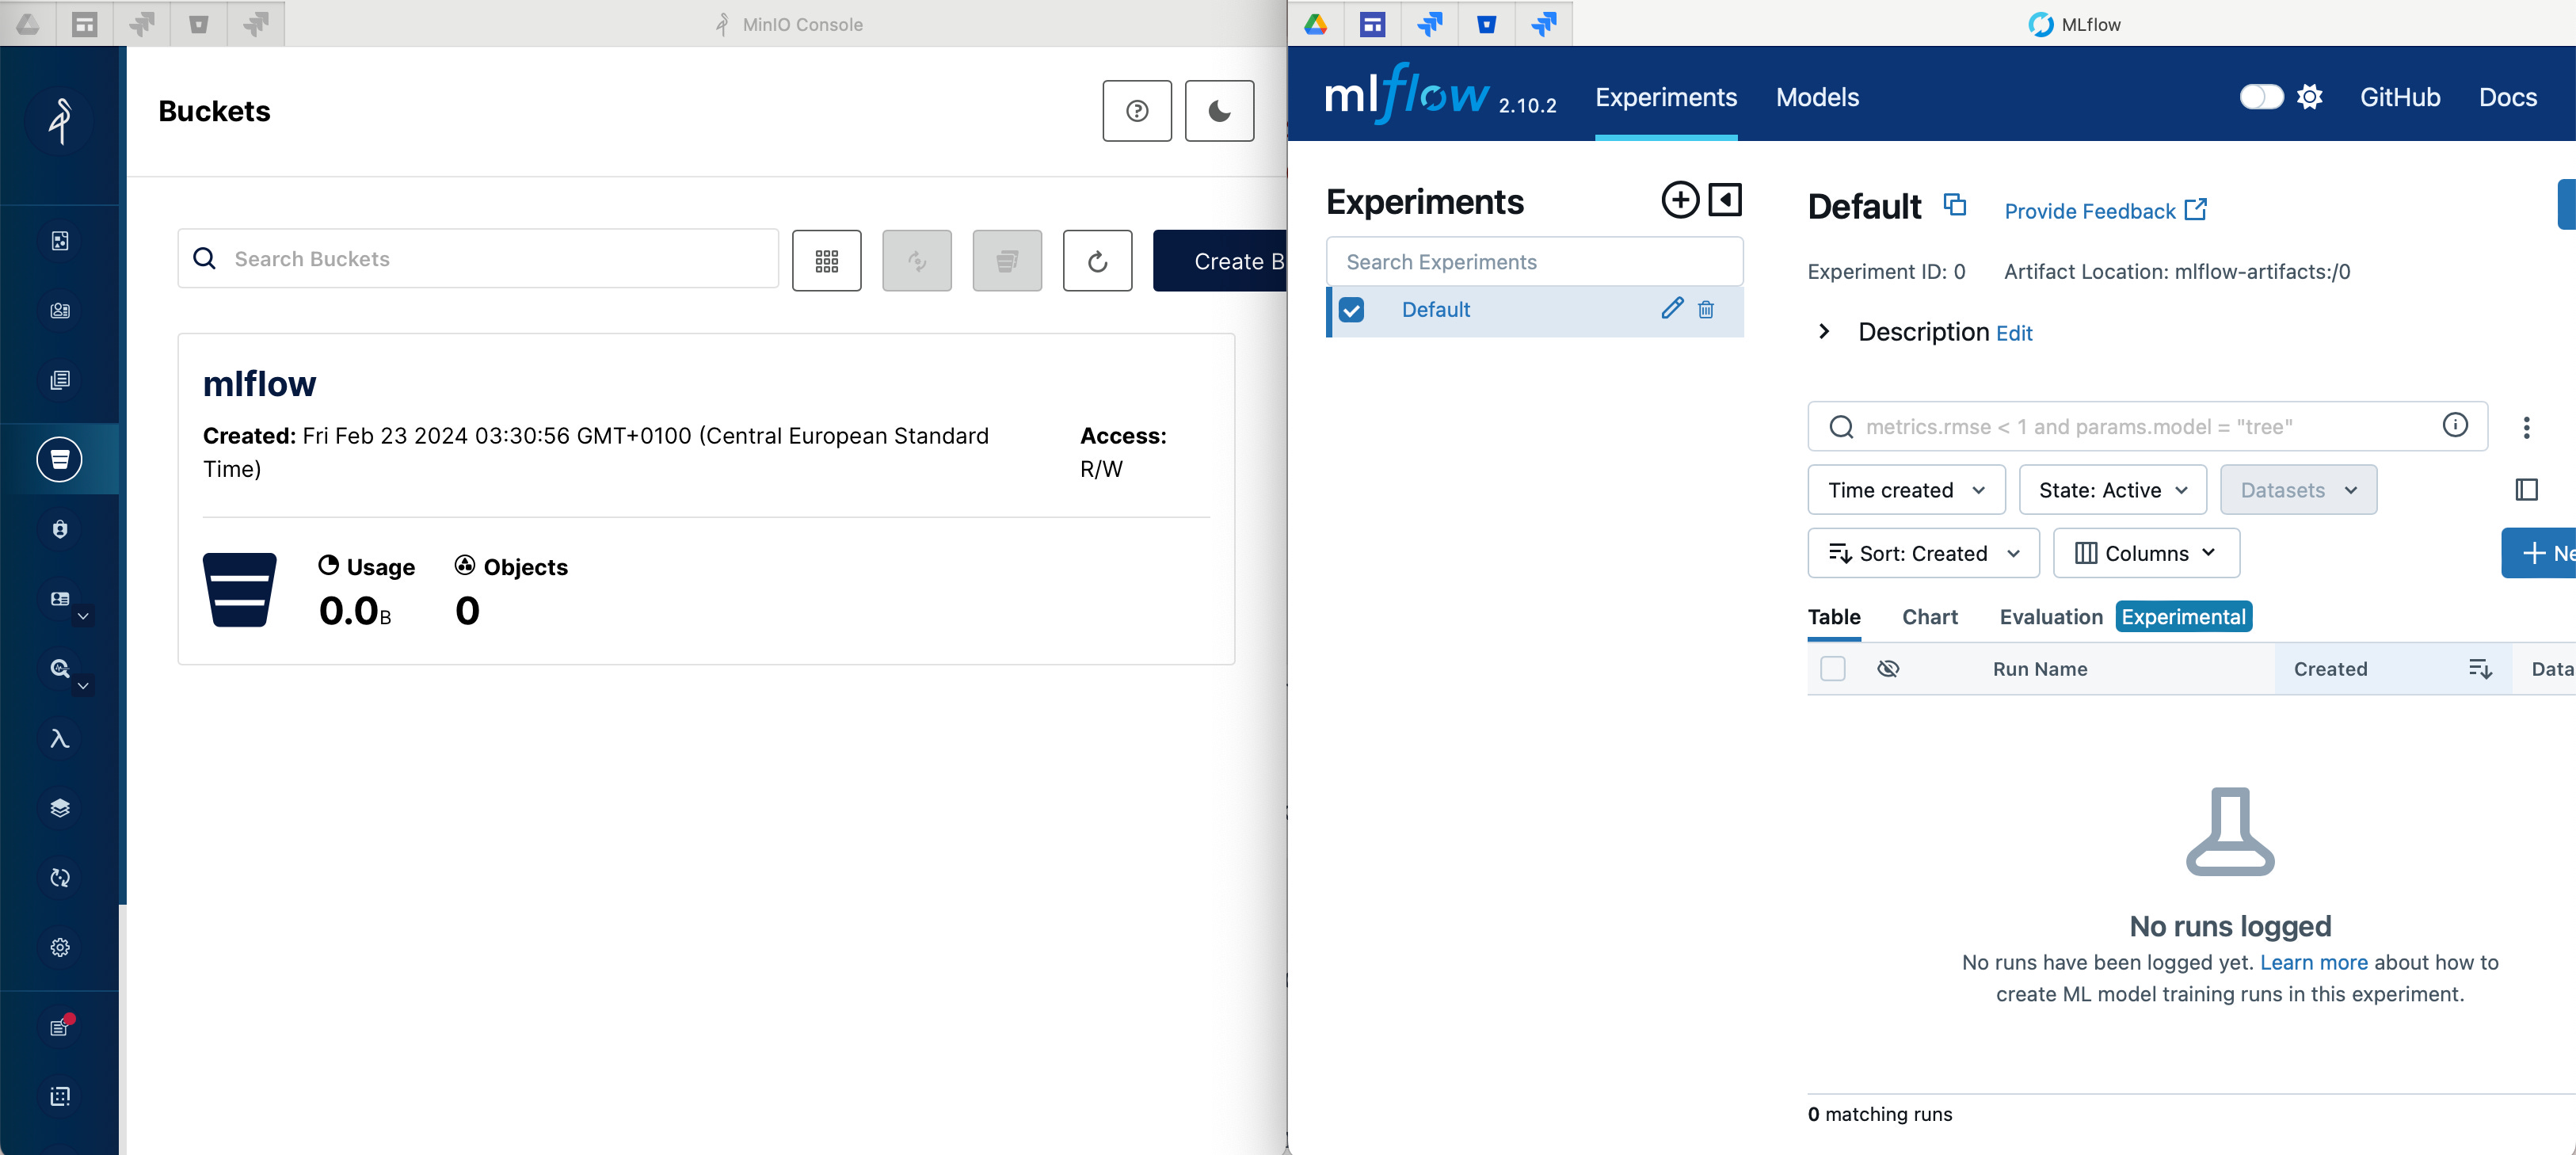
MLFlow UI: http://localhost:5000
MinIO Console: http://localhost:9001
PostgreSQL:
localhost:5432withpostgresas username and password
Test our setup
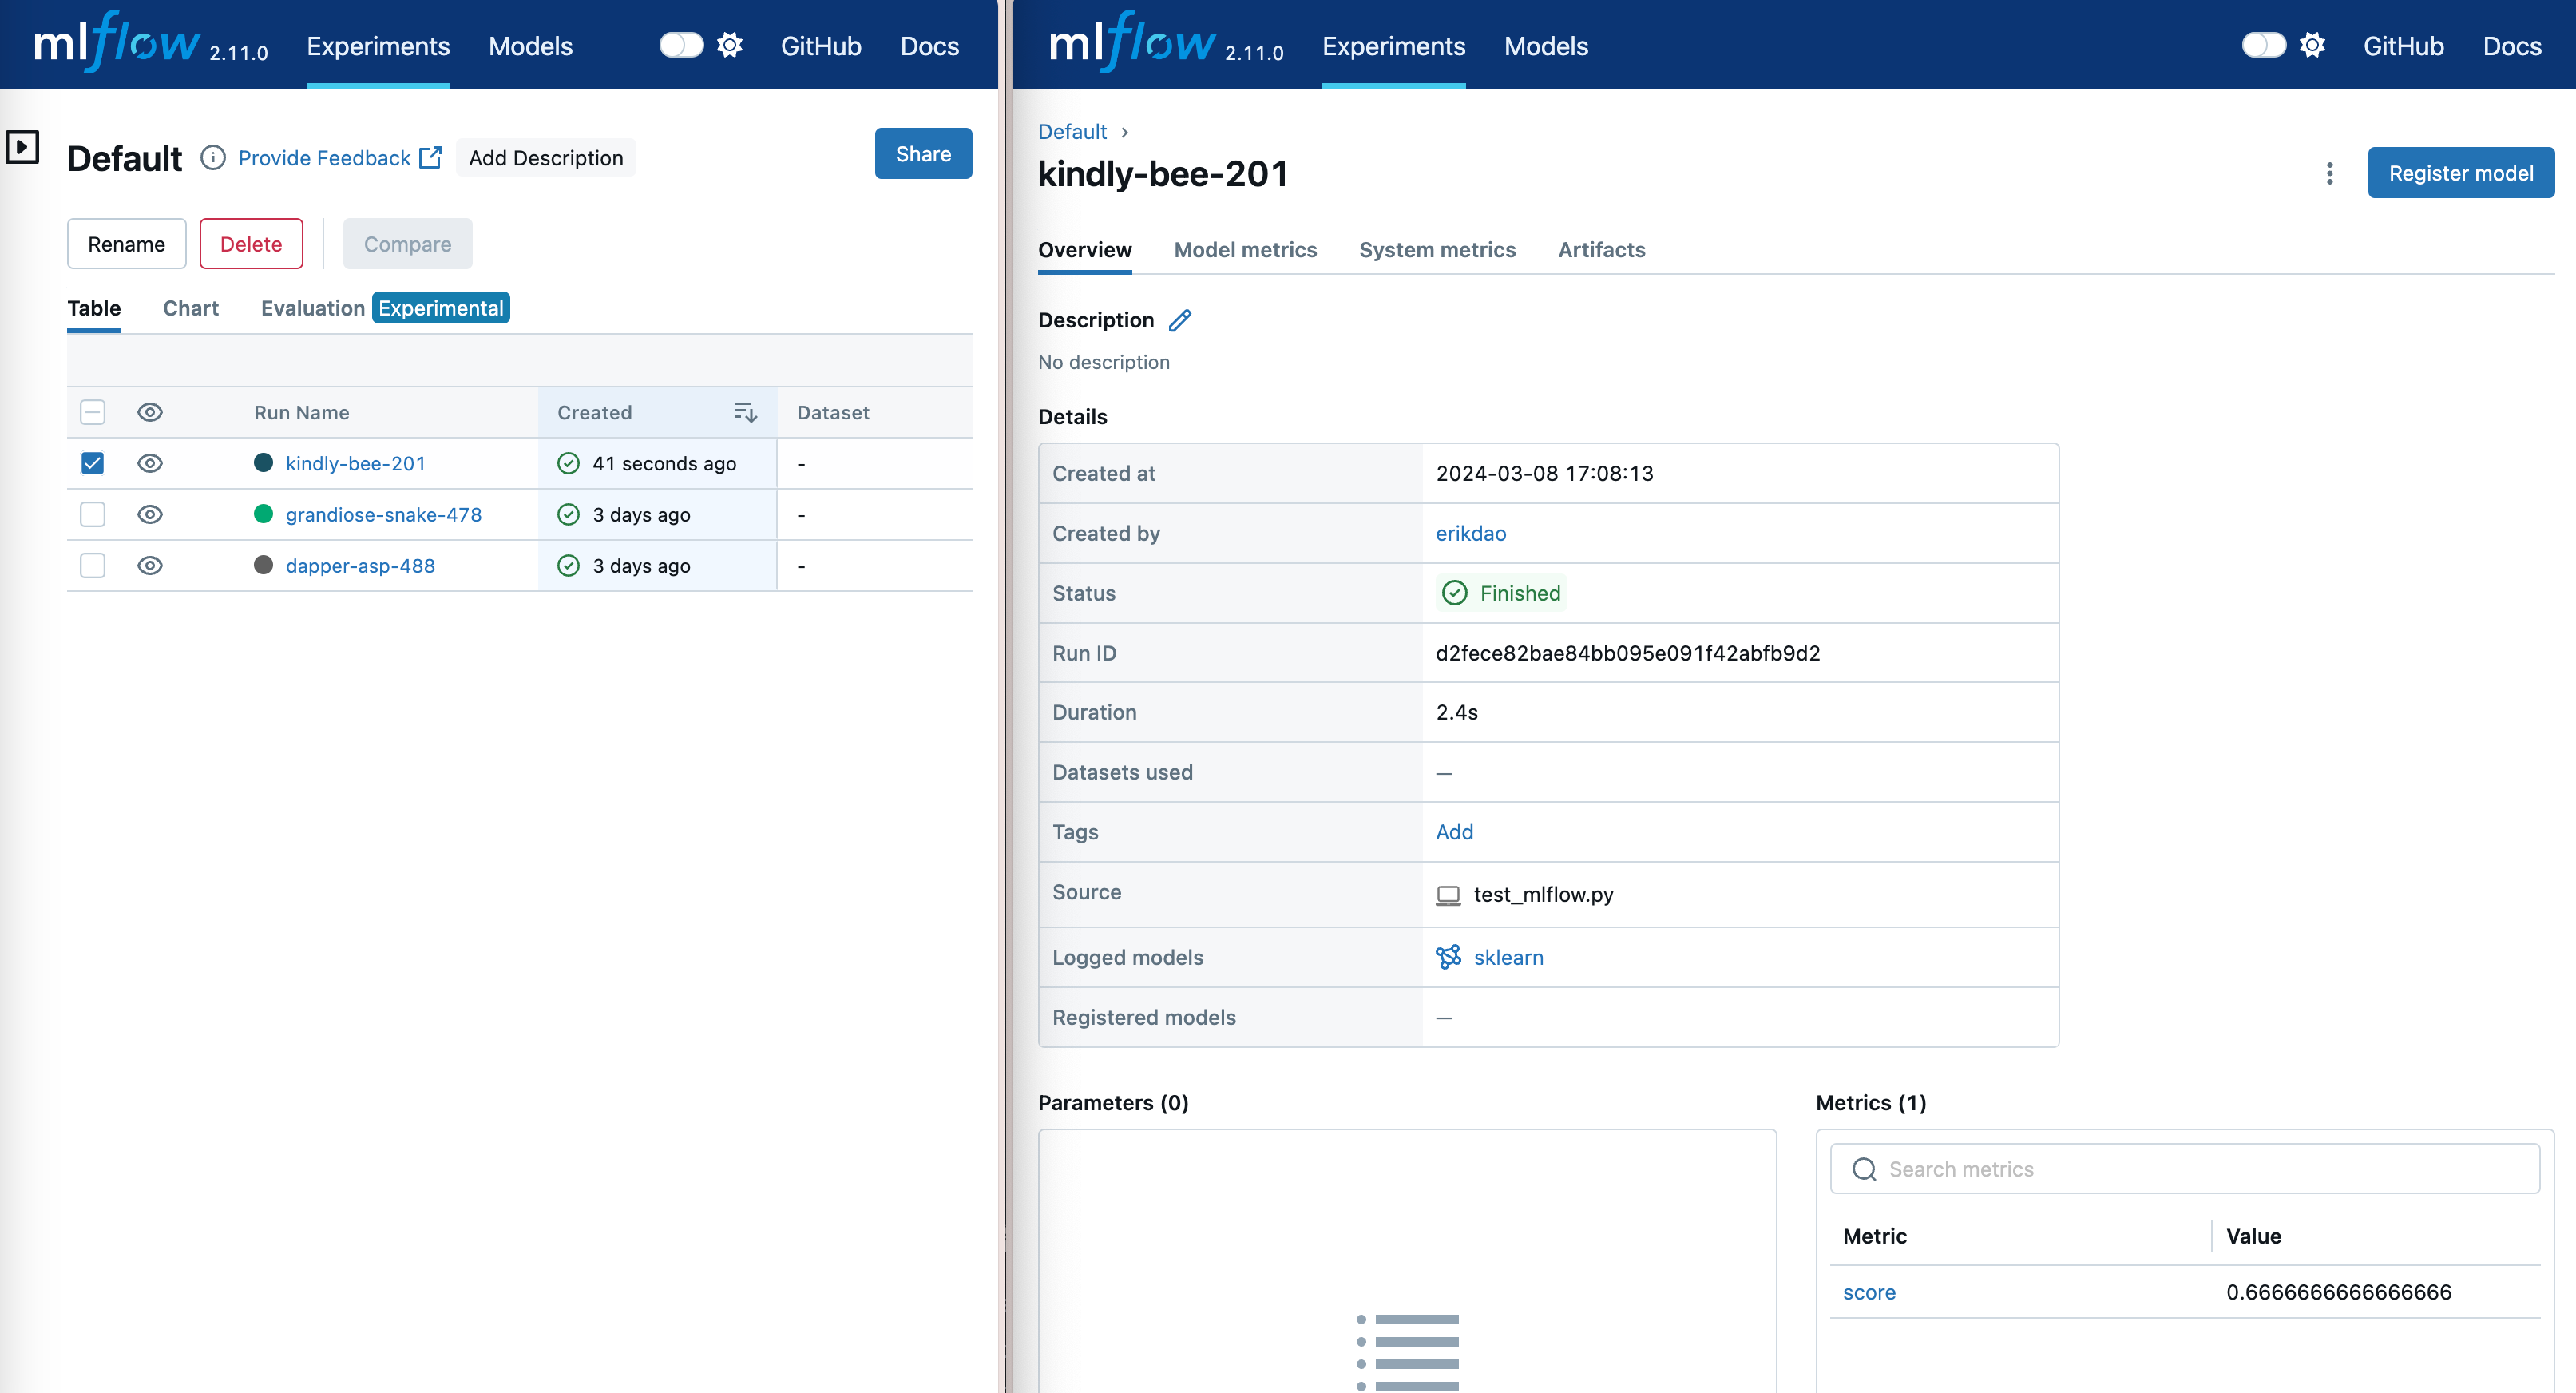
To see if our setup is working properly, we can run a simple Python script that uses MLFlow to log a model and some metrics.
import numpy as np
from sklearn.linear_model import LogisticRegression

import mlflow
import mlflow.sklearn
from mlflow.models import infer_signature

mlflow.set_tracking_uri("http://localhost:5001")

if __name__ == "__main__":
    with mlflow.start_run():
        X = np.array([-2, -1, 0, 1, 2, 1]).reshape(-1, 1)
        y = np.array([0, 0, 1, 1, 1, 0])
        lr = LogisticRegression()
        lr.fit(X, y)
        score = lr.score(X, y)
        print(f"Score: {score}")
        mlflow.log_metric("score", score)
        predictions = lr.predict(X)
        signature = infer_signature(X, predictions)
        mlflow.sklearn.log_model(lr, "model", signature=signature)
        print(f"Model saved in run {mlflow.active_run().info.run_uuid}")
After running this code, if you go to the MLFlow UI, you should see a new experiment with the model and metrics logged.
Et voila! We have setup an MLFlow Tracking Server with PostgreSQL as the backend store and MinIO as the artifact store. We can now use this setup for our local development and easily share it with other team members. We can also easily deploy this setup to production by using the same Docker Compose file and just changing the environment variables to point to the production database and MinIO server.
The code for this post can be found in this GitHub repository.